
Create Powerapps Nav Bar Component for Canvas App
By Joe Gill
Published On 26th November 2019
I wanted to get more familiar with building Canvas Apps in Power Apps so I thought I would try and create a Wizard type app, that guides a user through a series of input screens. My intention was to use it in Dynamics 365 instead of the deprecated Dialogs. As part of this exercise, I wanted to create some reusable components that I could use in my Wizards screens. This seemed a sensible approach and the recently introduced Canvas Apps Components looked a good fit to accomplish this. Canvas Apps Components allows you to create UI components that you can reuse across screens in your application. You can also export Canvas Apps Components for reuse in other Apps. You can read more details on the PowerApps component framework for canvas apps here
I thought I would start with a navigation bar with previous and next buttons that I could use on each page of my Wizard. The logic behind the buttons to determine which form to navigate to would need be data driven so I could reuse the component across multiple apps.
Step 1: Component functionality in Canvas Apps
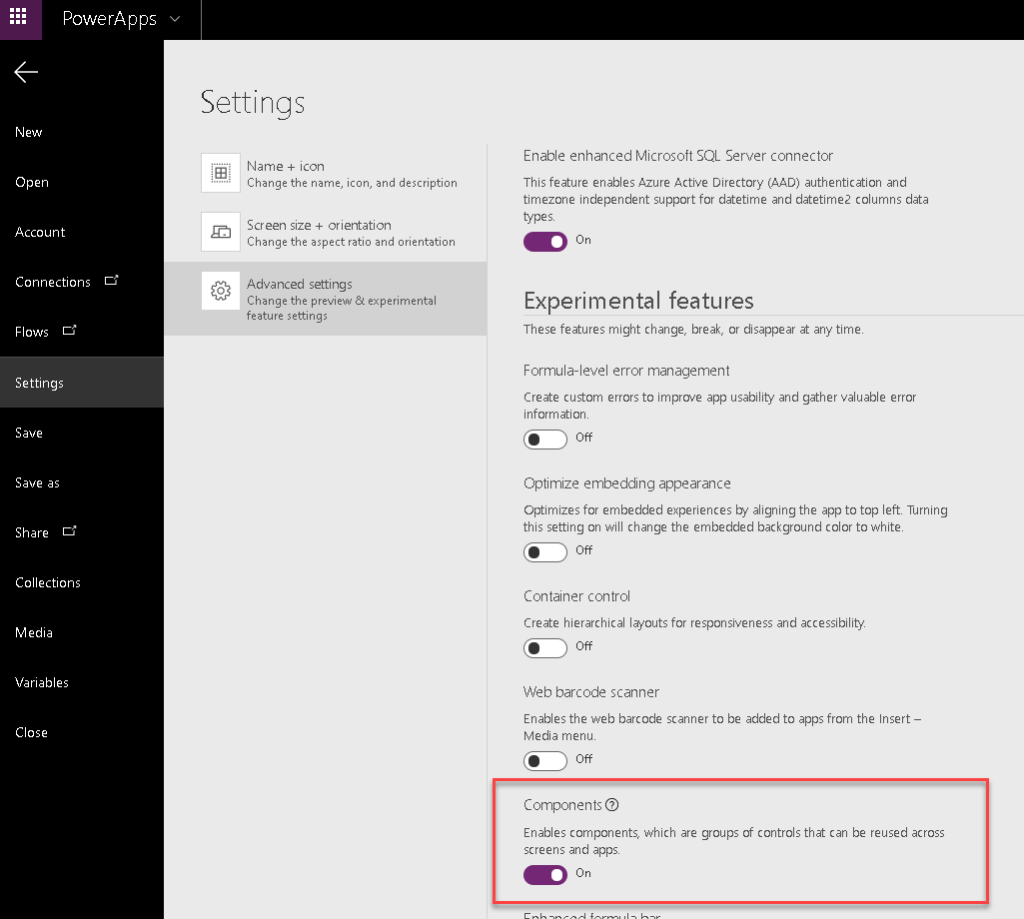
To use the new component functionality in Canvas Apps you need to go to App settings -> Advanced Settings -> Experimental features and turn Components on.
Step 2: Creating a component called WizbarNavBar
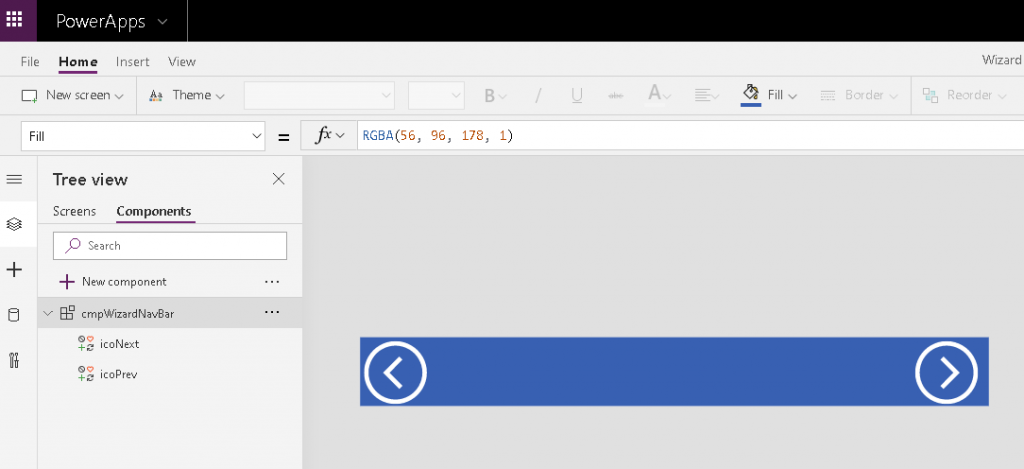
Once this is turned on the components tab will appear under your tree view. From there I then created a component called WizbarNavBar with Next and Prev icons.
The basic logic behind each button is to pass the current screen name to a function which will use it to determine which screen to navigate to. It sounds simple enough but it is not that straightforward in Canvas Apps. Firstly components don’t support the use of the App function so I can’t use the App.ActiveScreen.Name function within the component to get the name of the current screen. Instead I created an input called CurrentScreenName to pass the name of the current screen to the component. Properties are you how you send to and receive data from a component.
Step 3: Storing Navigation Rules
I also needed a data table of some sort to store the navigation rules. I tried passing a table as an input parameter but in the end I decided to create a collection to drive the navigation process. Collections are global accessible within an app so can be accessed within components. I added the code below to my App OnStart event to create the collection.
ClearCollect(
collWizardNavBarScreens,
{
ScreenName: “Screen1”,
Prev: Screen1,
Next: Screen2
}, {
ScreenName: “Screen2”,
Prev: Screen1,
Next: Screen3
}, {
ScreenName: “Screen3”,
Prev: Screen2,
Next: Screen1} );
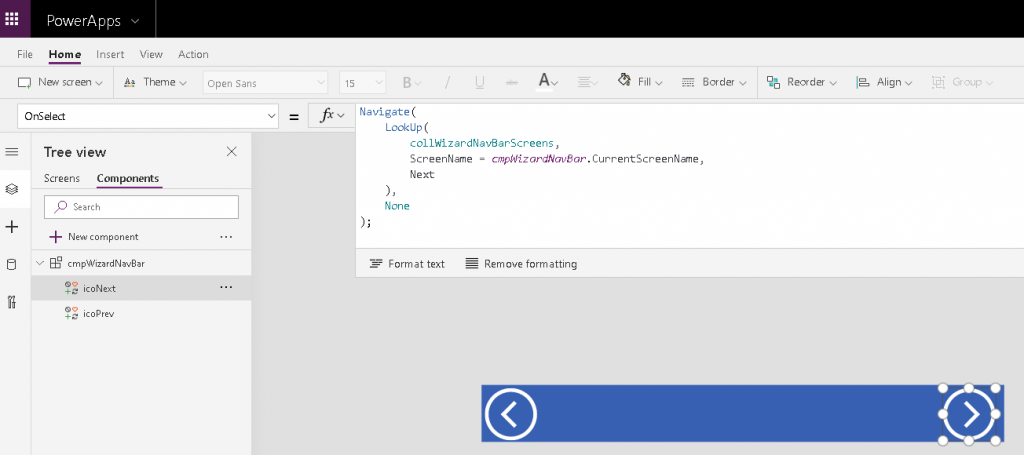
I then added the following code to the nav bar next icon select event. The code takes the current screen input parameter from the nav bar and uses it to lookup the next screen from the global collection. I used similar code for the Prev although I could have used the back function instead.
Navigate(
LookUp(
collWizardNavBarScreens,
ScreenName = cmpWizardNavBar.CurrentScreenName,
Next
),
None
);
Step 4: Adding Nav Bar Component to App
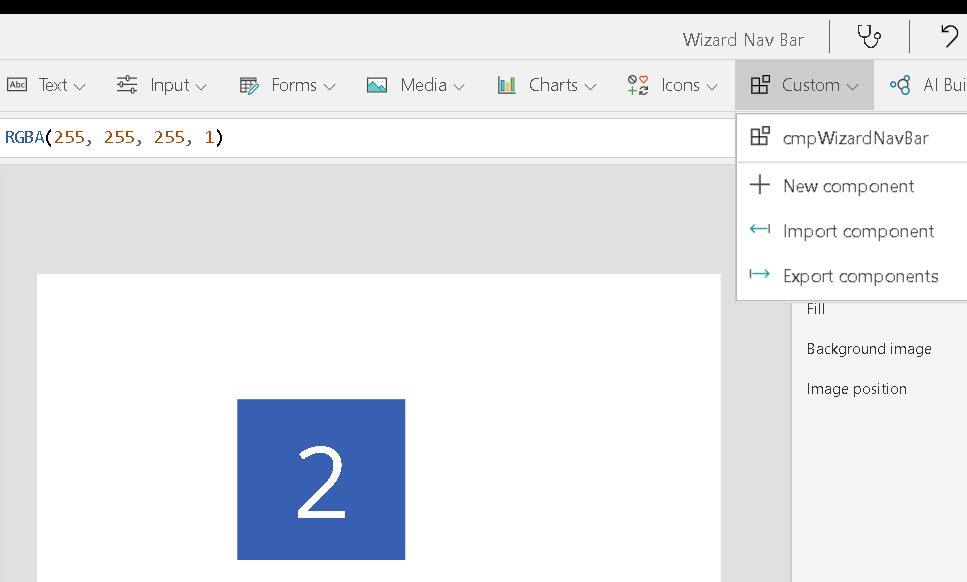
Now I have created my Nav Bar component I can add it any screen in my App from the Custom option.
Step 5: Set the current screen name input parameter
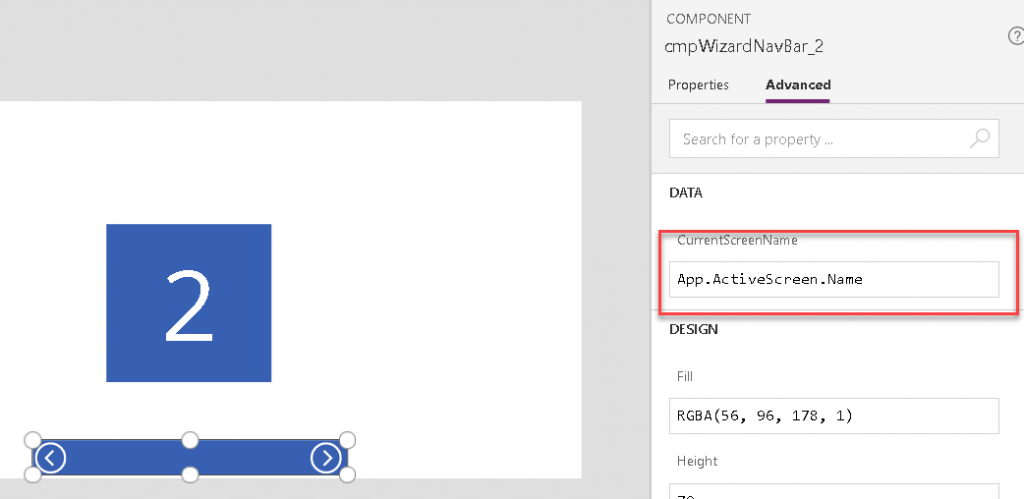
Once I have added the Nav Bar to a screen I need to set the current screen name input parameter using the App function as shown.
I now can easily create a set of Power Apps screens to guide the users through a process. All I need to do is add the Nav Bar to each screen and update the collWizardNavBarScreens collection with the navigation rules. Be interesting to try and extend this to cater for conditional navigation.
Unfortunately, the component framework is not yet available for Power Apps embedded in Dynamics 365/Model driven apps so I will need to revisit this task at a later date. Never the less it was interesting trying to get data-driven navigation working.