

CRM Queue with a Office 365 Shared Mailbox
By Joe Gill
Published On 4th January 2015
If you use Office 365 then the best option for CRM email queues is to use a shared mailbox as they don’t consume a license and there is no charge if they don’t exceed 5gb in size. Below is an example of the steps required to create a support email address and the associated queue in Dynamics CRM.
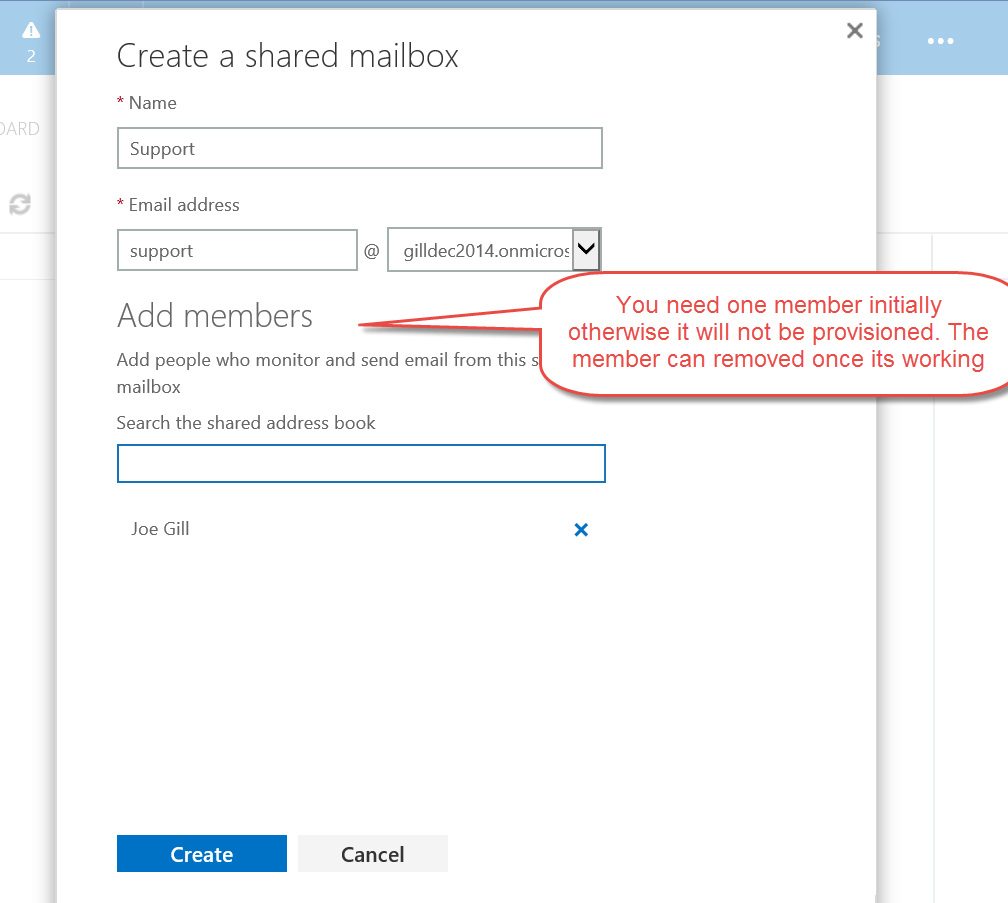
In the Office 365 admin portal select the new option under shared mailboxes and enter your desired email address with at least one member. Note: You must enter a member against the mail box otherwise it will not be provisioned. You can remove the member once it’s working.
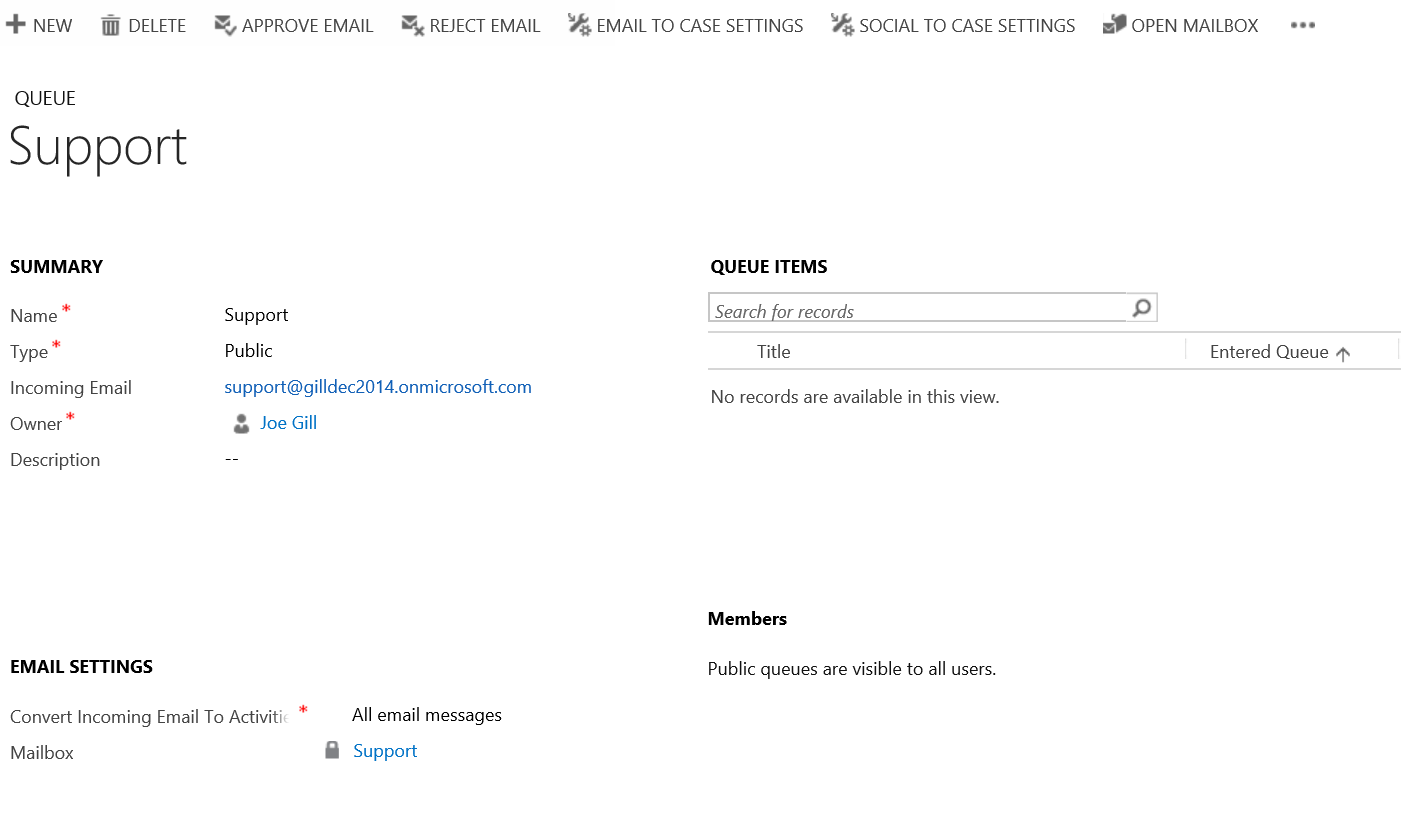
Emails sent to the support email address will tracked automatically in CRM.


In the Office 365 admin portal select the new option under shared mailboxes and enter your desired email address with at least one member. Note: You must enter a member against the mail box otherwise it will not be provisioned. You can remove the member once it’s working.


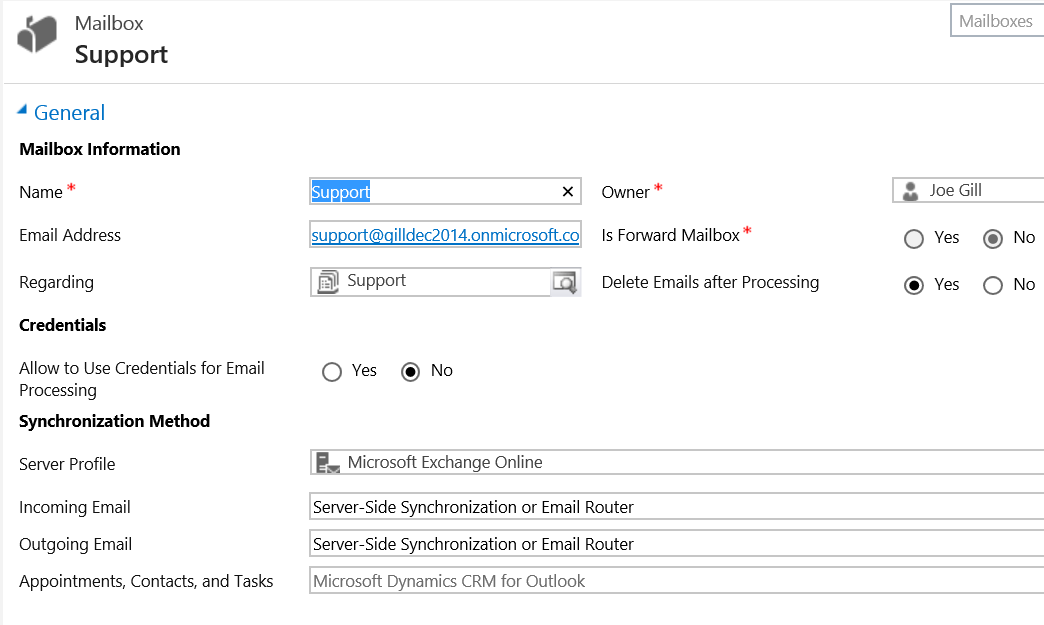
Configure the queues mailbox so that that the Incoming Email and Outgoing Email are set to Server Side Synchronization and Approve the Email.

Test and enable the mailbox. If you get the following error this is usually because you have forgotten to add a member to the shared mail box. “Email cannot be sent because the email address of the mailbox Sales requires an approval by an Office 365 administrator. The mailbox has been disabled for sending email and the owner of the email server profile Microsoft Exchange Online has been notified”
Emails sent to the support email address will tracked automatically in CRM.

The support queue can used to send emails from the support email address either from the UI or in a workflow.
