Power Automate Desktop – UI Flow
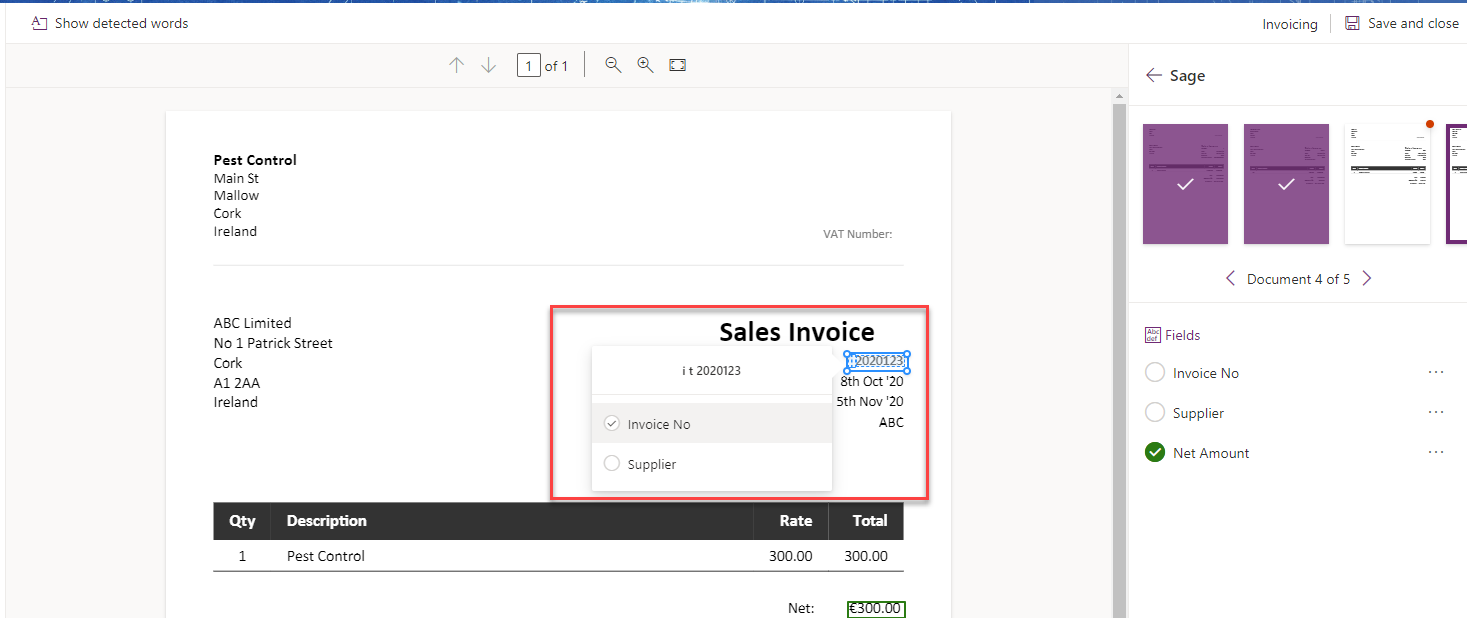
In a recent blog post I showed how you can use the Form Processing capabilities in AI Builder to extract the details of invoices received as email attachments. In this post, I am going to expand on this and take this invoice information and use a UI Flow to submit the invoice details to a legacy application. UI Flows provide RPA, Robotic Processing, Automation, capabilities to the Power Platform. RPA is when software replicates the actions of an user such as mouse clicks and keyboard entry. RPA is typically used for legacy applications where integration support is not available or expensive.
What is Power Automate Desktop?
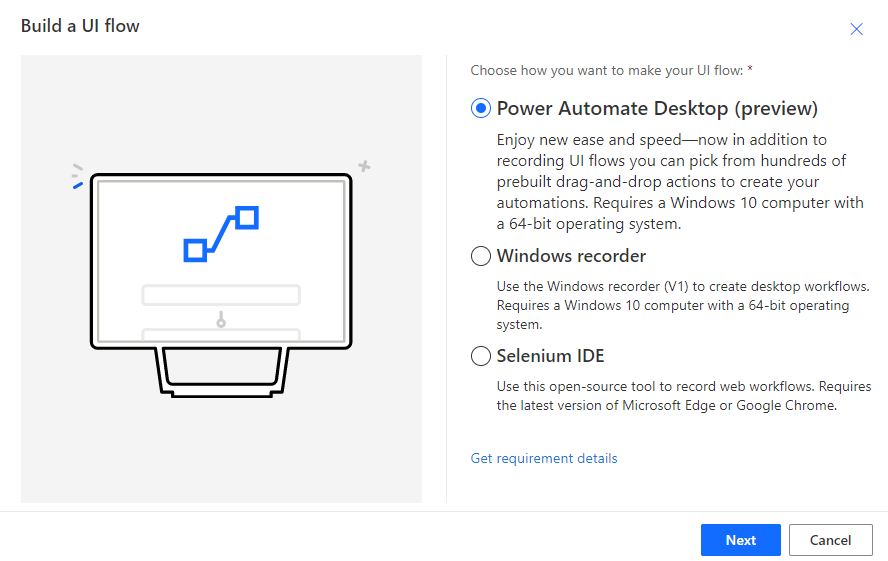
Power Automate Desktop is a relatively new addition to the Power Platform. It was previously known as WinAutomation until Microsoft made the very shrewd move of purchasing Softomotive the owners of WinAutomation. WinAutomation was a well established RPA product with significant capabilities and the purchase allowed Microsft to jump-start their RPA offering. Prior to this UI Flows could be created by either utilizing the Windows recorder or using the Selenium open source framework see my post on these. When you create a new UI Flow you are prompted to select which of the three types of UI flow you want to create. I suspect that Power Automate Desktop will become the preferred option for creating UI Flows. Having purchased WinAutomation I cannot envisage Microsoft will spend cash duplicating Power Automate Desktop capabilities in the other options.
Power Automate Desktop – Requirements.
Before creating a Power Automate Desktop UI Flow, you need to install the Power Automate Desktop app, third-party components and browser extensions from here. The on-premises data gateway also needs to be installed. The data gateway provides connectivity between to the local machine and the cloud.
How to create a Power Automate Desktop UI Flow
Here are the steps I followed to create a UI Flow using Power Automate Desktop to replicate a user entering invoice details into a legacy windows application.
Step 1: Create a UI Flow
Select the new UI Flow option and then the Power Automate Desktop option. Then give your UI Flow a name.
The Power Automate Desktop App will start.
The designer will then open and you can create your flows’ steps by dragging actions from the left hand actions menu on to the central panel.
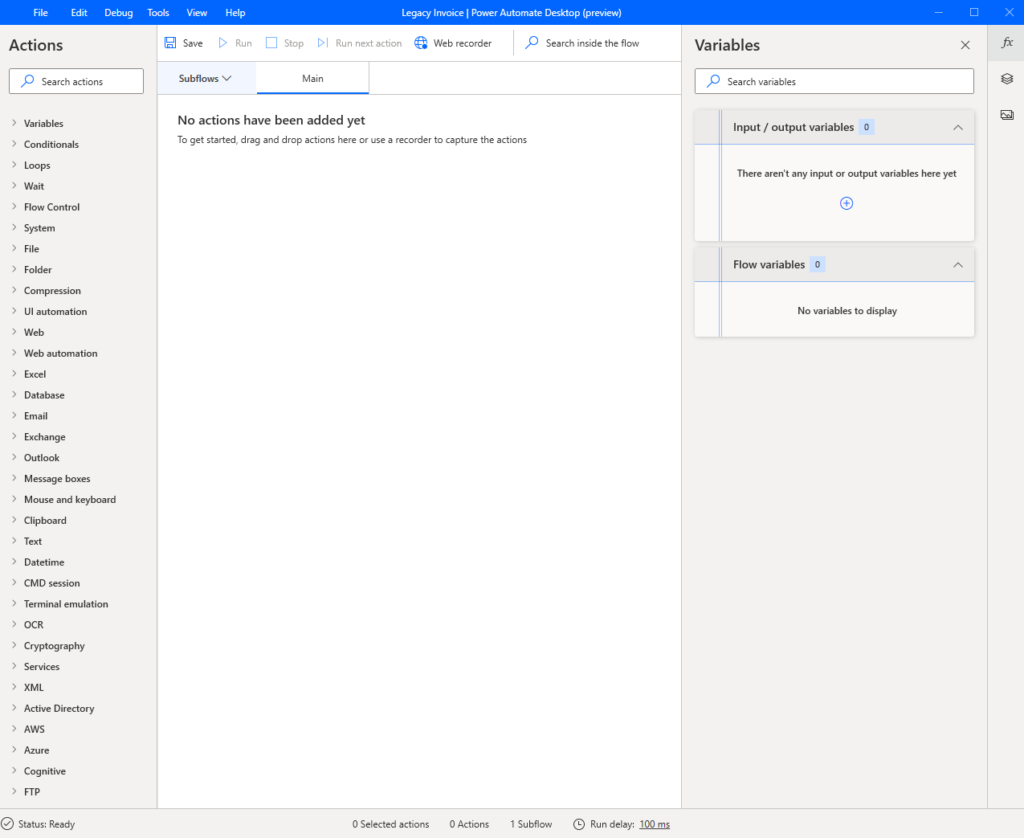
Step 2: Recording Actions
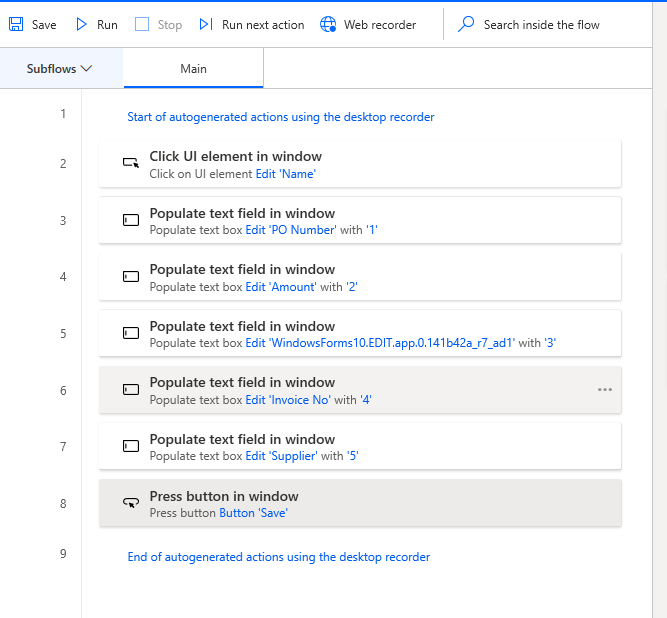
An easy way to create your actions is to use the record option which can be found under the tools menu. You can use the recorder to record the steps a user would carry out to enter invoice details.

When you have finished recording click on Finish and your recorded actions are copied to the designer. You don’t have to record all your steps in one go and you record in stages if prefer. You can test your UI flow by running it from the designer with the option to step through your actions if you are getting problems.
Step 3: Define Input Variables
The next step is to create input variables that will be used to pass data into your UI Flow. Variables are created from the right panel of the designer.
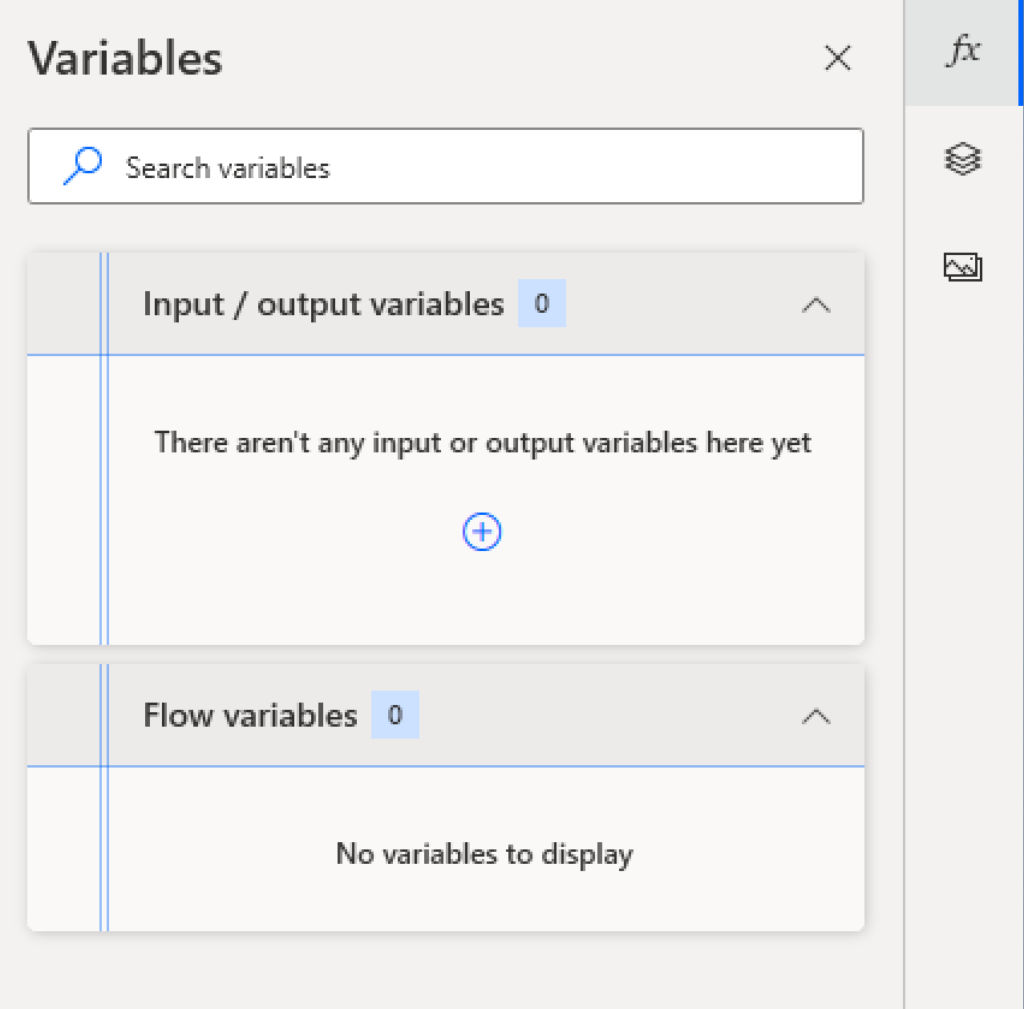
In this example, I have created an input variable for each item of invoice data I am going to pass from the AI Builder.
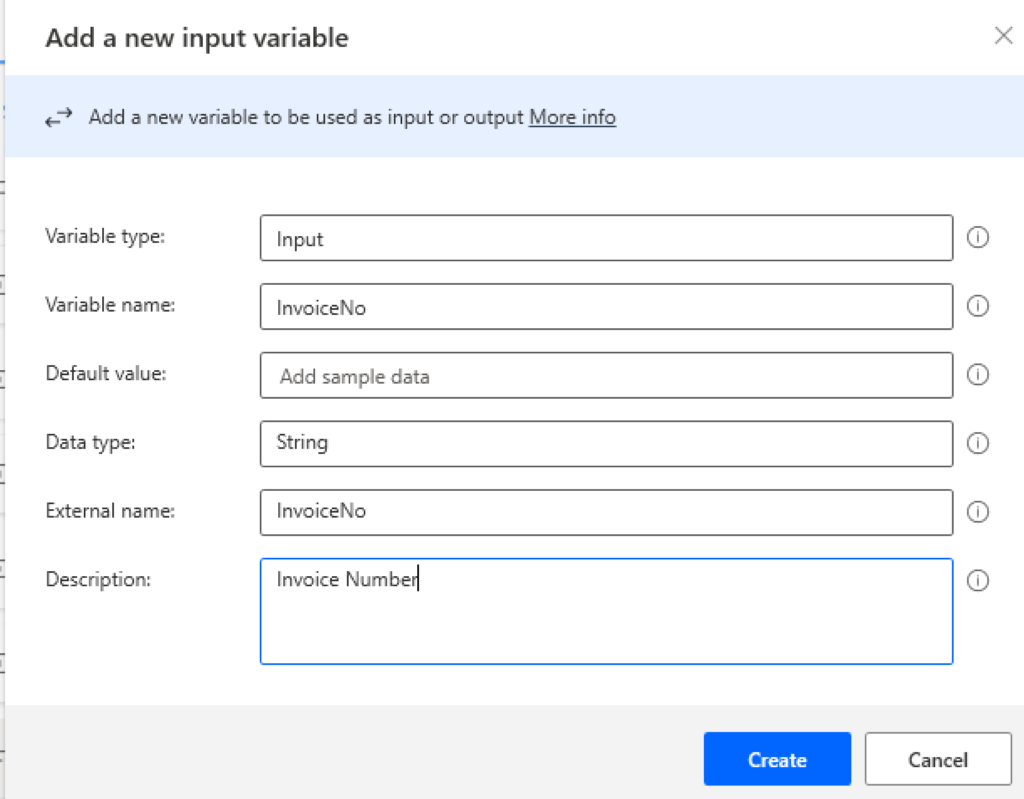
Step 4: Add the Input Variables to your Actions
Next, I edited each action in the flow deleting the text I entered when recording the actions, replacing it with an input variable.
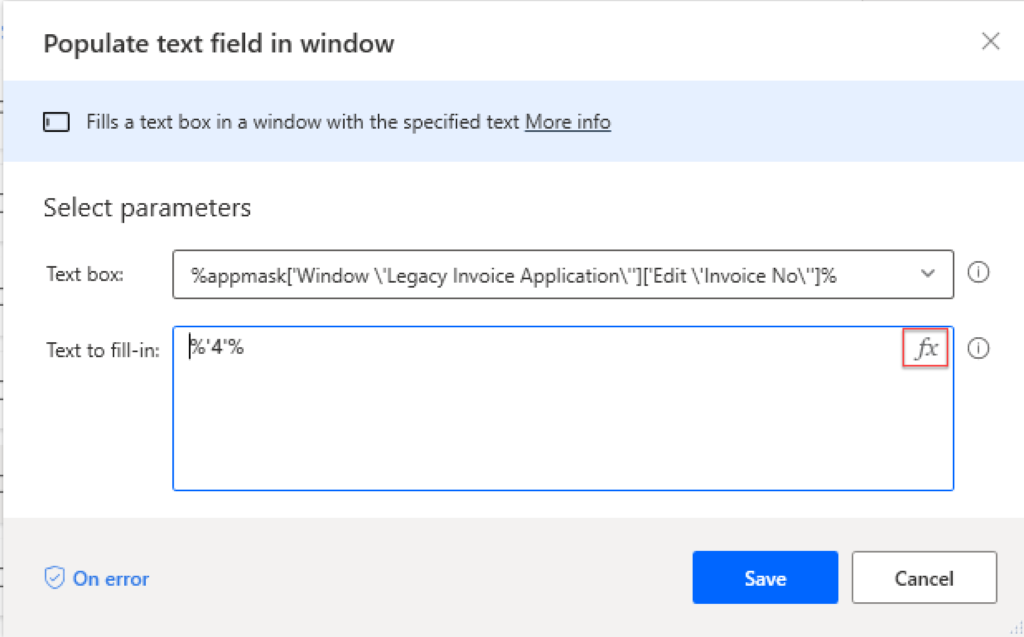
Click the fx symbol to choose the input variable to use instead of your recorded text.
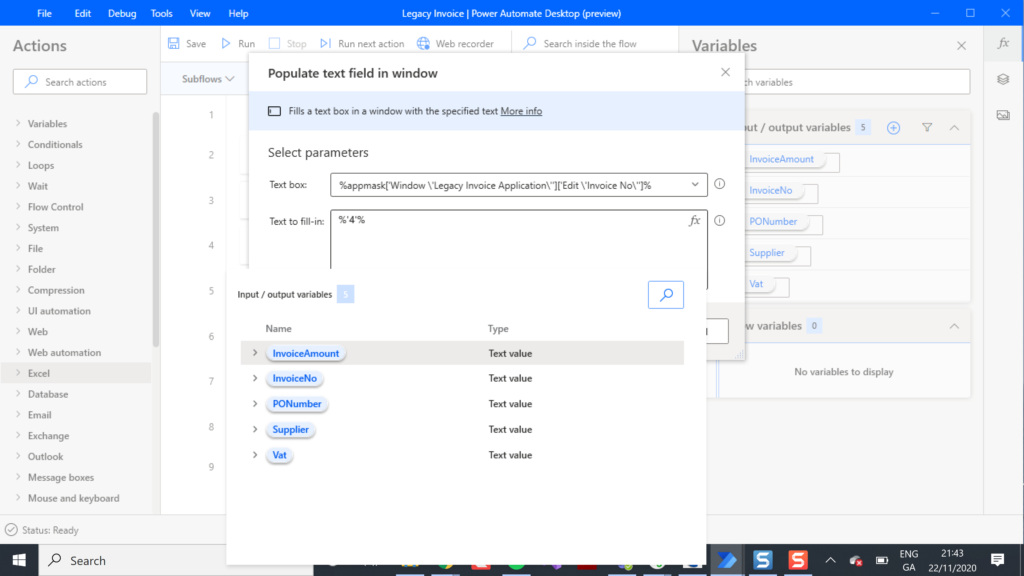
Step 5: Save and Running your UI Flow
Once you have substituted in your variable you are ready to Save your flow. I needed to add a Wait action to my recorded steps to give the application a chance to load before executing the UI actions. Once saved you can close the Power Desktop App and return to the maker designer where your UI Flow is now saved.
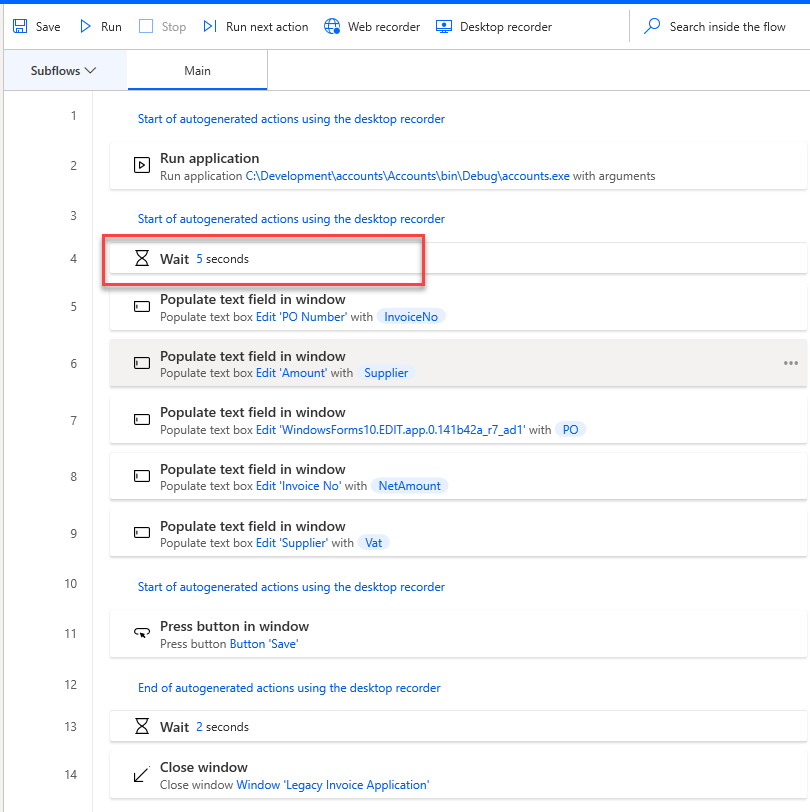
Step 6: Calling your UI Flow
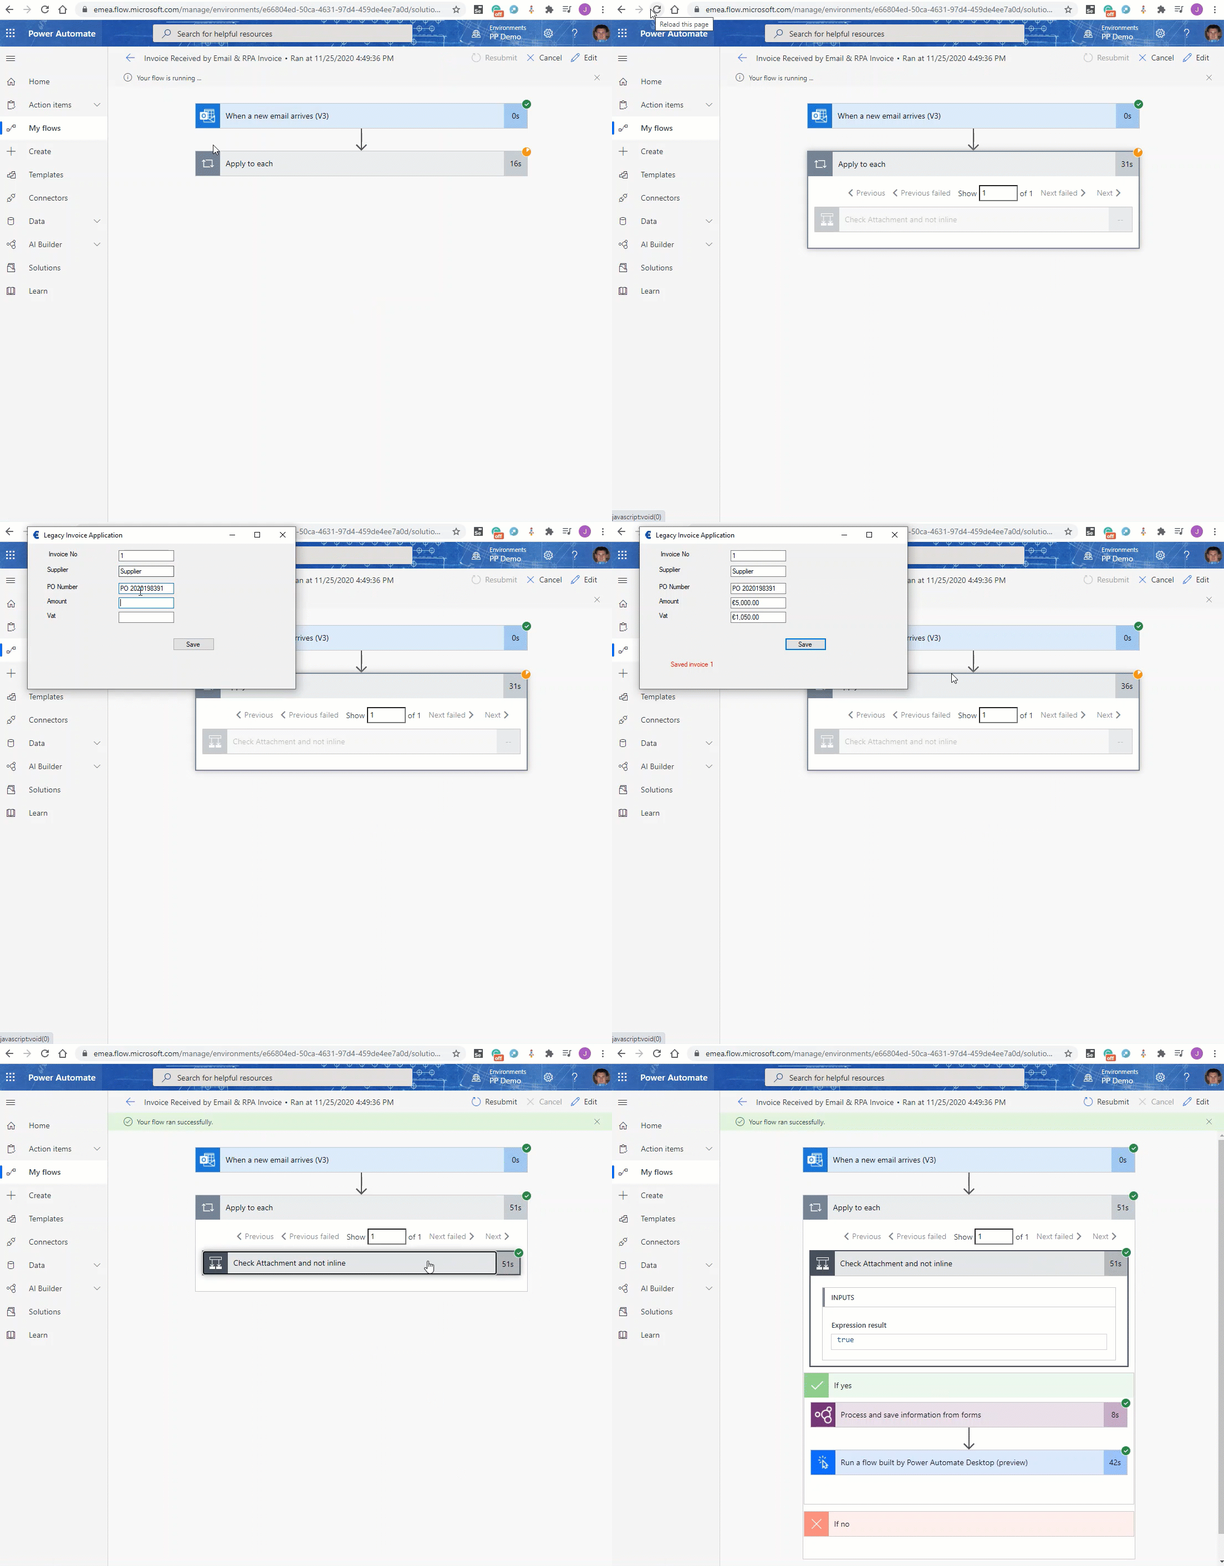
Calling you Power Automate Flow is simple as adding the action “Run a flow build by Power Automate Desktop” to your Power Automate Flow, selecting the UI FLows and populating its parameters. In my example, I have added the Power Automate Desktop action to my invoice processing flow using the data extracted by AI Builder as the parameters.
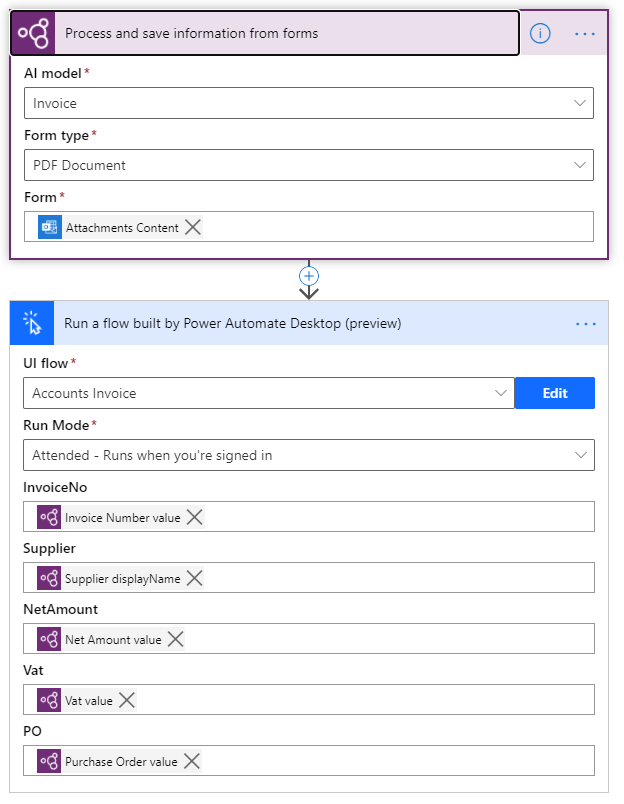
Summary
The purpose of this post and many of my other posts is to demonstrate how the Power Platform can help with your Digital Transformation projects. In this example I have used AI Builder, Power Automate, and Power Automate Desktop to automate processing invoices directly into a legacy application without manual intervention. Up until recently being able to automatically carry out Optical Character Recognition (OCR) on a document received via email would have required significant technical skills. Then being able to take this information and replicate a user’s actions to enter this data into a legacy system is pretty impressive.
