RPA – Power Automate UI Flows
Microsoft support for RPA in the form of Power Automate UI Flows has recently been released. Here I have done a brief post to demonstrate how easy it easy to create and deploy a UI Flow. Before I explain the process involved I’m going to briefly introduce what Robotic Process Automation and Power Automate UI Flows are all about.
What is Robotic Process Automation (RPA)?
Robotic Process Automation (RPA) is when the mouse clicks and keystrokes carried out by a user to complete a task are replicated by a software process. It is typically used to perform time-consuming tasks on legacy platforms where integration is not possible or expensive. RPA tools help organisations accelerate their digital transformation projects without having to replace legacy systems or develop expensive integration solutions.
What is Power Automate UI Flow?
Power Automate UI Flows supports the automation of both windows applications and web applications and uses different frameworks for both. However, in both cases the steps to create an UI Flow are the same.
Creating Power Automate UI Flows
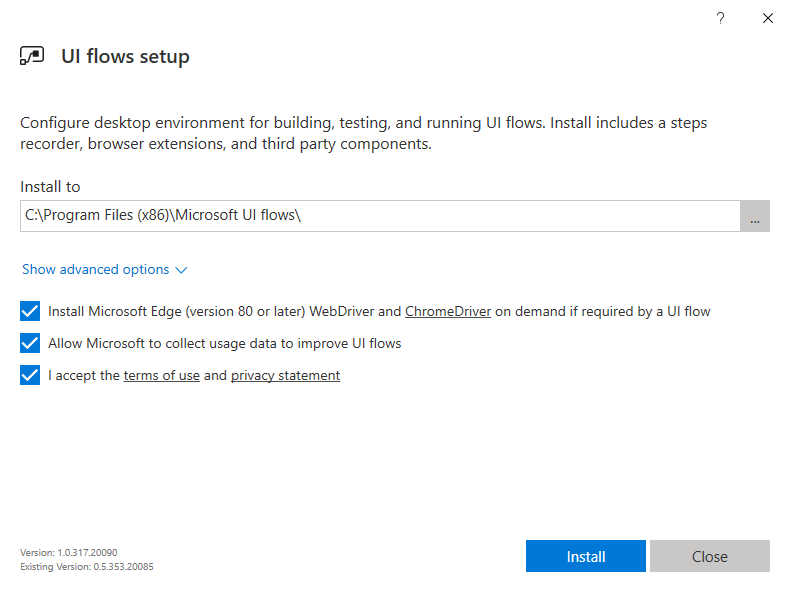
Step 1: UI Flows Setup
To create a UI Flow you record the steps you want the flow to execute, substituting in parameters instead of typing values. You can also capture text from the application and return this from your flow. Before you can create a UI Flow you need to download the tools required to record and test UI Flows. You will be prompted to download the tools the first time you create an attempt to create a UI Flow.
Step 2: Create a UI Flow
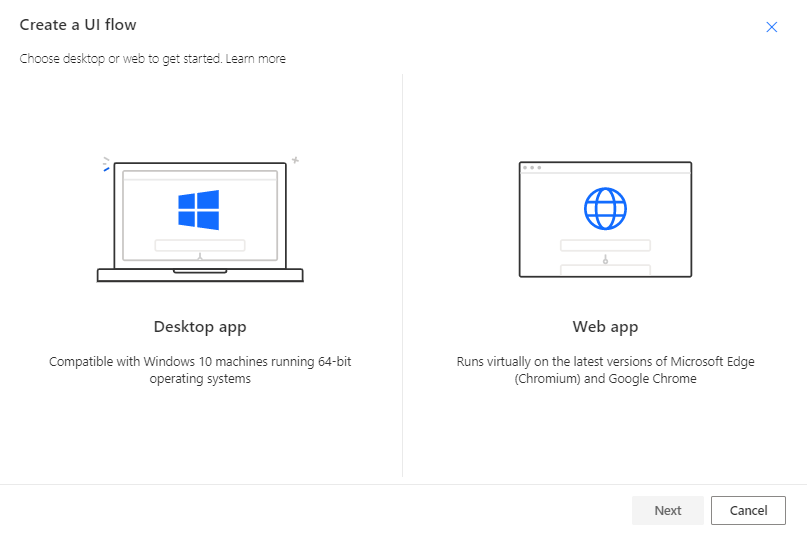
Power Automate UI Flows supports the automation of both windows applications and web applications and uses different frameworks for both. The Web UI Flows utilizes Selenium, a long-established open-source testing framework, to record and run the automated tasks. The first step in creating a new UI Flow is to select which type of application you are automating. For this example, I have selected a Desktop App as I want to automate the process of adding a ledger credit to my accounts system.
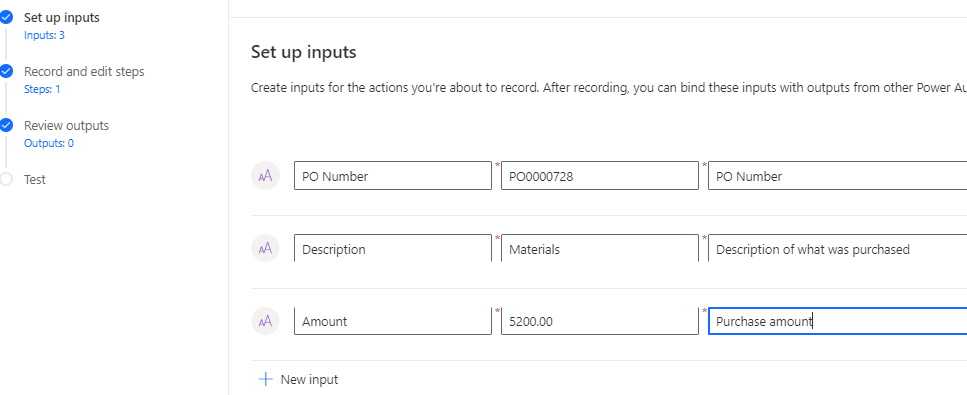
Step 3: Define Input Parameters
Before you can records your steps you need define the input parameters you want to pass to your Flow to use for data entry.
Step 4: Record Steps With Launch Recorder
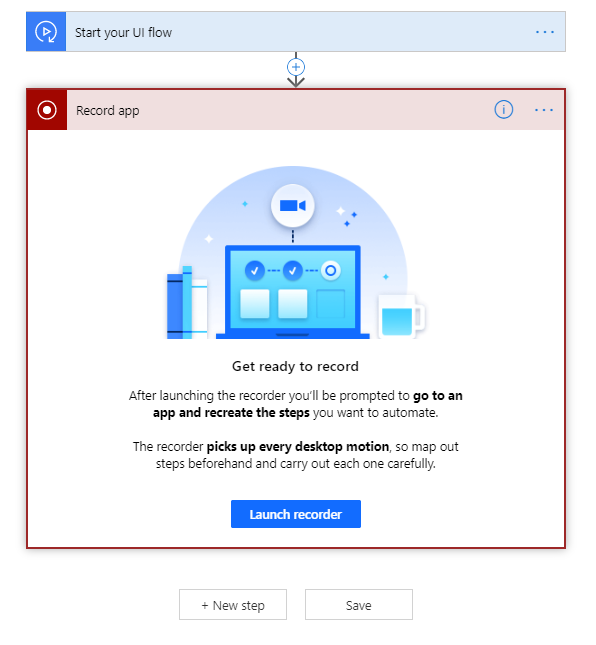
The next step is to record your steps by clicking the Launch Recorder option.When you want to use an input parameters as data entry value select the Use Input option and select the parameter and then click on the data entry field you want populated.
Step 5: Define Output
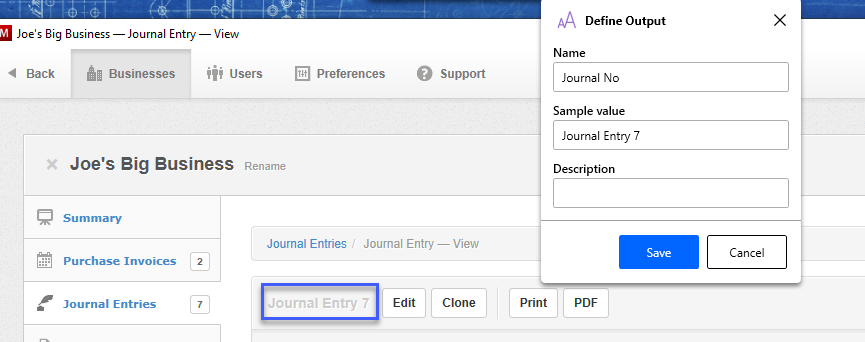
Typically once you have completed the task you will need to grab some some information from the task you have completed and return it to the flow. You do this by select the Get Output option and highlighting the text you want to return in your parameters giving it a name.
Step 6: Test UI Flow Is Completing Your RPA Tasks
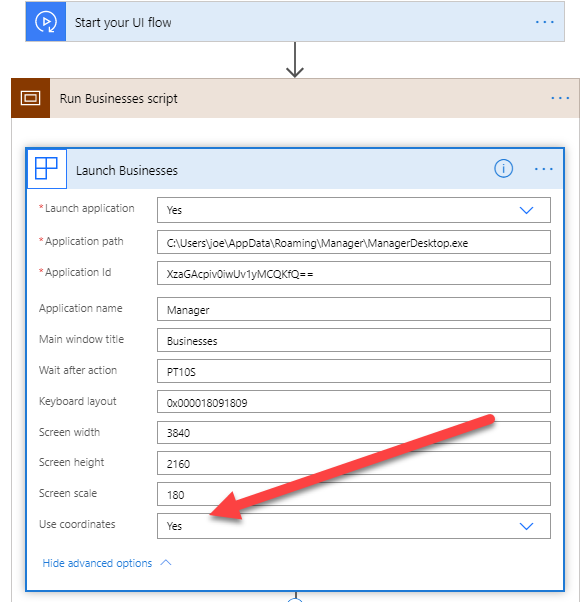
Once you finish recording your steps they are saved with your Flow. You can use the test option to check if your UI Flow is completing your RPA tasks. I found I needed to enable coordinate-based playback for my UI Flows to work. This can be turned on from the advanced settings on the first step. More details about coordinate-based playback here.
Step 7: Editing Recorded Steps
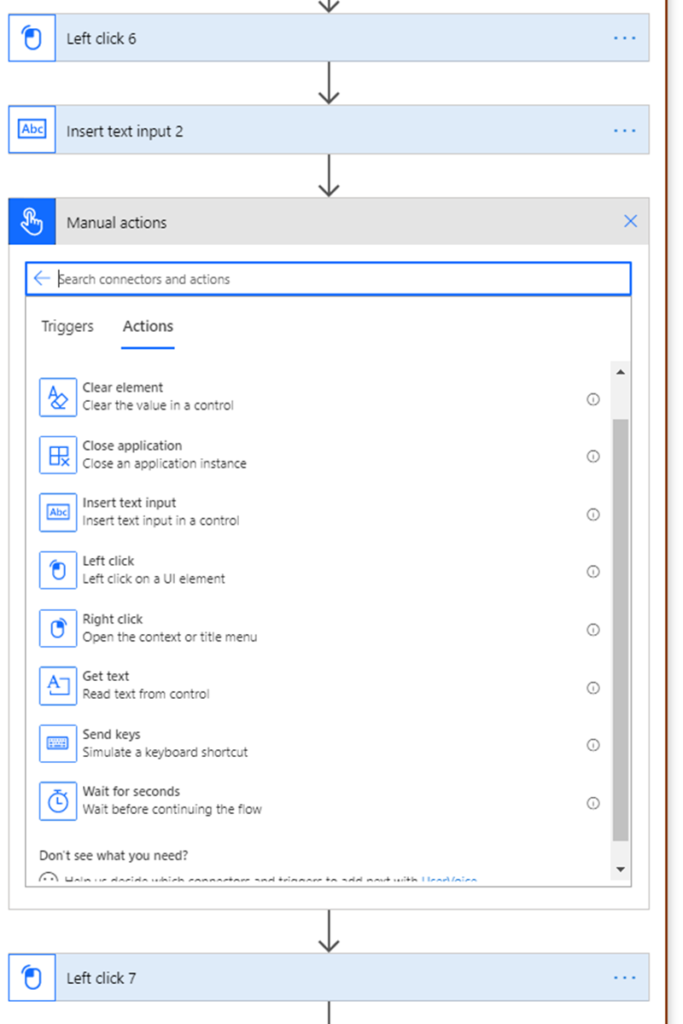
You can edit your recorded steps and add manual actions as required.
Step 8: Creating Another Flow To Call It
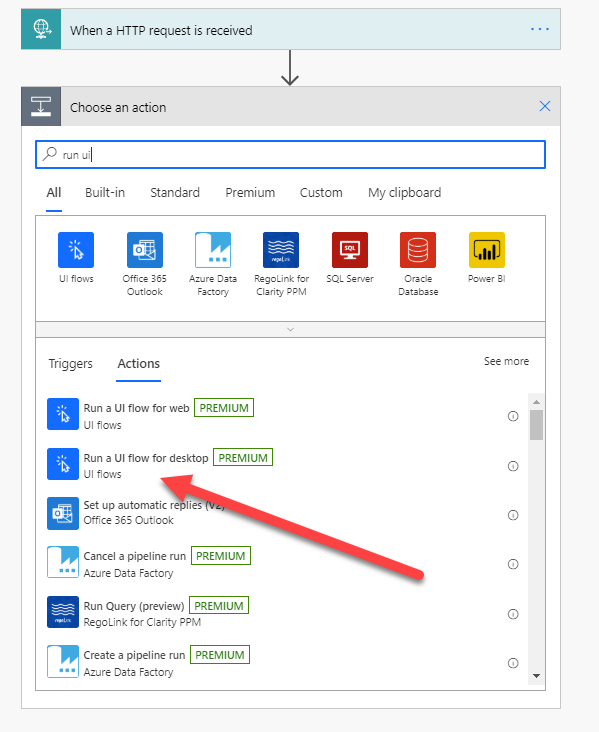
UI Flows are not deployed directly and they must be called by another Flow by using the Action “Run a UI Flow”. So you will need to create another Flow to call it and in my example I created a http request Flow that accepted the three input parameters in a Json message and passed them to the UI Flow.
Step 9: Configure Connection To Your Flow
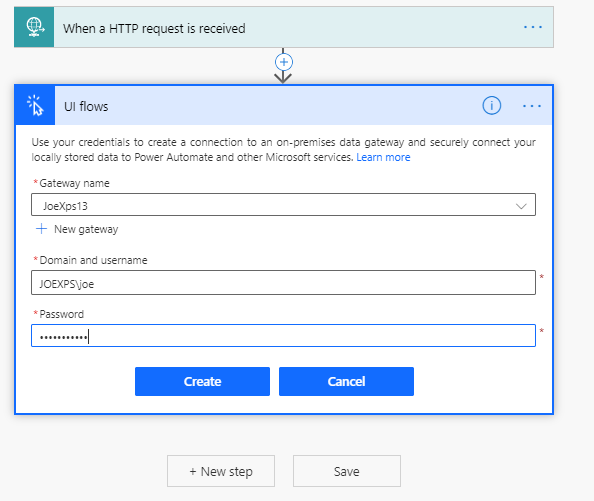
Although Power Automotive Flows get triggered in the cloud UI Flows run locally and therefore need an on-premise data gateway installed on the computer where they are to run. A data gateway acts as a connector between cloud services and an on premise services. I did a previous post on the data gateway here. You need to configure the connection in your flow to connect to that machine specifying the Gateway name and the username and password.
It is really easy to automate manuals task using Power Automate UI Flows and the RPA capabilities are pretty impressive. I am looking forward to trying some other scenarios. The capabilities of the Power Platform are continuously improving and being extended. The addition of UI Flows to the Power Platform offers great potential to digitize integration with legacy systems.


